|
|
Day 4 Take Better Photos |
The upside of the smartphone's ubiquity is that we're all carrying an extremely capable HD camera in our pocket nearly all of the time. Unfortunately, just because you've got a camera on you, doesn't mean you're taking great photographs with it. 
Zachary ShenalDon't miss out on documenting life's most memorable moments and don't obscure those memories with a poorly captured picture. In an effort to improve your skills and be the guy people can rely on for a great shot, we asked photographer Zachary Shenal for some pointers along with recommendations on the best apps for editing your shots. "They're simple tips, but you should see a vast improvement in your images," says Shenal. "Like anything, it takes practice to make perfect, but by this time next year, your friends won't even believe you took your photos."
The Basics
Before we get into techniques, there are some basics that you should be aware of in order to get the best shot.
1
Clean your lens.
If your lens is smudgy, your pictures will look like you smeared them with Vaseline, so I recommend checking and wiping your lens off (your shirt tail is fine) before taking a picture. This ensures optimum sharpness and minimum flare.
2
Make sure you have good light.
While your iPhone camera is amazing for what it is, cellphones are still lightyears behind DSLRs in terms of sensor size, so if you try to take a picture in a dark room or in low light, you're going to see a lot of grain in your image, and all your details will be mushy. Taking photos in well-lit places will ensure you have the best files to work with when it comes time to edit.
Taking the Photo
1
Look for distractions.
Is there random clutter in your picture? Stuff that doesn't need to be there? A visually pleasing picture is one that's clean and with a clear subject or story. Eliminate any junk or elements that don't need to be there. If it's something you can't remove, like a tree, that's okay (and you can always use an app to edit it out).
2
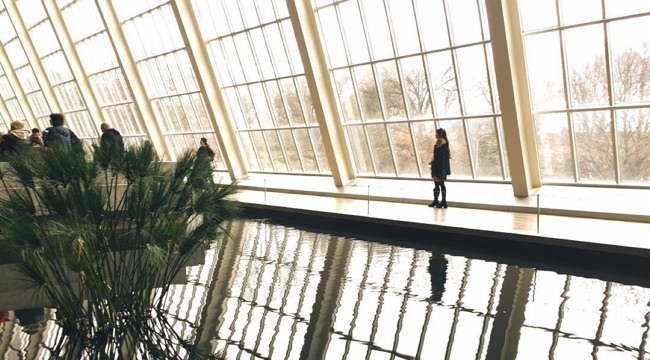
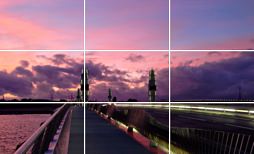
Pay attention to your framing.
This is where your creativity is going to come into play to help you decide what should go where. While a subject may look good in the center of the frame, often times the Rule of Thirds (mentally grid your frame into thirds and place it on one of the two dividing lines) will provide a visually satisfying image as well.
3
Choose dynamic light.
While good light is needed for good pictures, it should also be interesting light. Landscapes and outdoor shots look best with warm, angled evening light (what we photographers call "Golden Hour"), and portraits and food photos typically look best with soft, even light. Though it may sound counterintuitive, overcast days make for fantastic portraits, as the clouds act as a massive diffuser for the sunlight.
4
Level your frame.
This one is pretty self-explanatory, but just make sure your horizons are level, and things aren't slanted to one side.
Editing Your Shot
1
Decide if it needs to be edited.
While most photos benefit from a little bit of a contrast boost or tone adjustment, some photos are great how they are, and it should just be said: no photos are improved with an Instagram filter. If it can't stand by itself, editing probably can't save it.
2
Perform the basics.
When I edit something on my phone, the first adjustments I make are to the exposure, the shadows and the highlights. I like my photos to pop, but it's important to not go overboard.
3
Work on the color.
My next and often final step is to adjust the various color tones. Color grading can give your photo a very distinct look, and help to tell your story. If you like the cinematic look, an easy way to achieve this is to add blue tones to the shadows, and orange tones to the highlights. These colors are opposites on the color wheel, and are used because they help make skin tones pop and add drama to an image. The right apps (see sidebar) can help you with these techniques.

Pro-Recommended Apps

Polarr
"By far the best mobile editing app. It's all you need to crop, level, adjust and export all your images. You can even save your favorite adjustments as a preset to make editing easier."

Manual
(for iOS)
"This iPhone app gives you control of your camera's shutter speed, ISO and manual focus. If you have a bigger camera and prefer the amount of control it gives you, this app can help you feel a little more in control."

Snapseed
"I'm not a huge fan of editing in this slightly confusing app, but I keep it because it has a clone tool to help remove things you don't want in your picture."

